

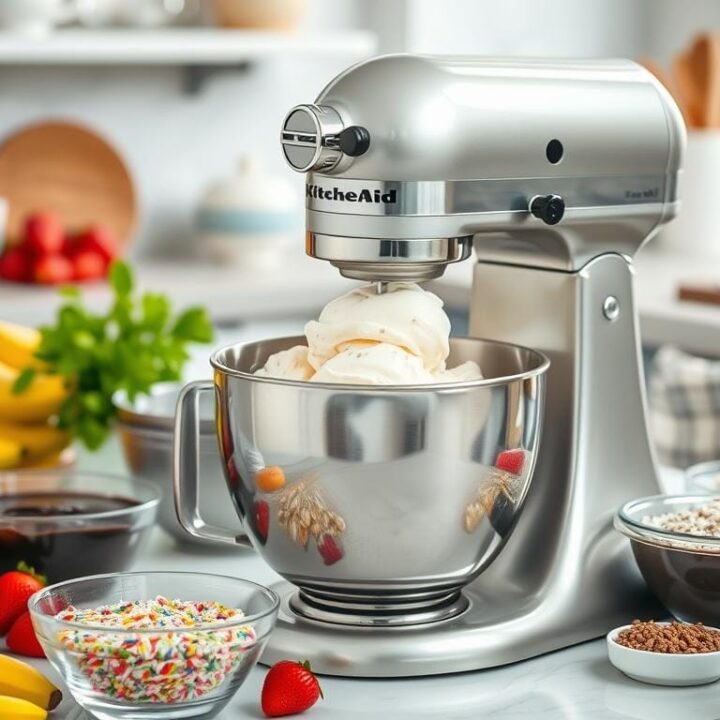
Summer is here, and nothing beats homemade ice cream to cool you down. It brings back memories of childhood summers and creates new ones with loved ones. The Kitchenaid Ice Cream Maker attachment makes it easy to make creamy, delicious treats. Get ready to enjoy the art of ice cream making with your KitchenAid® stand mixer.
Key Takeaways
- Discover the joy of creating your own Kitchenaid ice cream recipes at home
- Learn tips and techniques for using the Kitchenaid Ice Cream Maker attachment
- Explore a variety of Kitchenaid ice cream flavors, from classic vanilla to indulgent chocolate
- Understand the role of key ingredients like cream, milk, and eggs in achieving the perfect texture
- Troubleshoot common issues and master the art of homemade ice cream making
Introduction: Discovering the Joy of Homemade Kitchenaid Ice Cream
Homemade ice cream brings joy and creativity that store-bought can’t. With the Kitchenaid Ice Cream Maker, making delicious treats is easy. You can make everything from vanilla to chocolate, all in your kitchen.
The Allure of Homemade Ice Cream
Homemade ice cream is special because it’s fresh and of high quality. With simple ingredients, you can make a dessert that’s better than store-bought. It’s fun to create your own flavors and mix-ins.
Why Choose the Kitchenaid Ice Cream Maker
The Kitchenaid Ice Cream Maker is a must-have for ice cream lovers. It works with your Kitchenaid stand mixer, making ice cream easy. Its powerful motor and design make creamy, smooth ice cream simple to make. It’s perfect for both experienced cooks and beginners.

“The Kitchenaid Ice Cream Maker has revolutionized my approach to ice cream making. It’s a game-changer that has unlocked a world of homemade frozen delights in my kitchen.”
Essential Ingredients for Creamy Kitchenaid Ice Cream
The secret to making creamy Kitchenaid ice cream is in the ingredients. Quality dairy and sweeteners are key. Each part is crucial for the perfect scoop.
Dairy Essentials: Cream, Milk, and Eggs
Great ice cream starts with top-notch dairy. The Kitchenaid Homemade Vanilla Ice Cream recipe uses heavy cream and whole milk. They give the ice cream its creamy texture.
This recipe doesn’t need eggs, making it good for those with dietary limits. Yet, it still tastes rich and creamy.
Sweeteners: From Sugar to Syrups
The sweetener you pick changes the ice cream’s taste. The recipe uses 1 cup of sugar, but you can adjust it. Adding chocolate syrup or caramel can make it even better.
The ice cream is versatile. You can try different sweeteners and mix-ins. This lets you make a unique, artisanal treat.

“The secret to making the creamiest, most decadent ice cream at home lies in the quality of the dairy ingredients and the perfect balance of sweeteners.”
Understanding the Role of Eggs in Ice Cream
Eggs are key to making homemade ice cream creamy and smooth. The KitchenAid Ice Cream Maker Attachment uses egg yolks as a natural stabilizer. This makes the ice cream velvety and sets it apart.
The egg yolks thicken the ice cream base into a custard. This custard traps air bubbles during churning. It also prevents big ice crystals, making the ice cream creamy and scoopable.
Egg yolks also add a rich flavor to the ice cream. Their high fat content makes the ice cream creamy and indulgent. This complements the sweetness of other ingredients.
| Ingredient | Quantity | Function |
|---|---|---|
| Egg Yolks | 4 large | Custard base, stabilizer |
| Granulated Sugar | 3.9 oz / 110 g | Sweetener |
| Whole Milk | 12.7 oz / 360 g | Dairy base |
| Heavy Cream | 12.7 oz / 360 g | Dairy base |
| Dutch-processed Cocoa Powder | 1 oz / 28 g | Flavor |
To make the perfect Ice Cream, balance egg yolks, dairy, and sweeteners. The right mix of these ingredients creates a rich, creamy, and indulgent ice cream. Your family and friends will love it.

What is a Crème Anglaise?
Crème anglaise, also known as French custard, is a key ingredient in many ice cream recipes. It’s especially popular in vanilla ice cream made with the Kitchenaid Ice Cream Maker. This custard sauce is made from dairy, eggs, and sweetener, creating a rich, creamy base for various frozen treats.
The French Connection: Crème Anglaise as an Ice Cream Base
For centuries, crème anglaise has been a cornerstone in making high-quality ice cream. It’s made with heavy cream, whole milk, sugar, and egg yolks. These ingredients are also found in many classic ice cream recipes.
Tempering the eggs and cooking the mixture to the right consistency is crucial. This makes the crème anglaise thick and creamy. This step is key to achieving a smooth, velvety ice cream.
| Crème Anglaise Ingredients | Typical Amounts |
|---|---|
| Heavy Cream | 310g |
| Whole Milk | 310g |
| Granulated Sugar | 100g |
| Egg Yolks | 6 |
| Vanilla Beans | 1-2 |
The French connection is strong, as crème anglaise is used in many classic desserts. Churning this custard base into ice cream brings French culinary tradition to life.
Tips for Using the Kitchenaid Ice Cream Maker Attachment
Making homemade ice cream with your Kitchenaid stand mixer is a joy. To make sure your ice cream turns out great, here are some tips for using this Ice Cream Maker Attachment.
Freezing Time is Crucial
The freeze bowl of the Kitchenaid Ice Cream Maker Attachment needs to be frozen first. It takes at least 15 hours in the freezer for best results. Make sure the bowl is fully frozen before you start making ice cream.
The Importance of Churning Duration
The Kitchenaid Ice Cream Maker Attachment can make up to 2 quarts of ice cream. Churning takes about 20-30 minutes. Churning too fast can slow down the process, so find the right speed for your ice cream’s texture.
Adding Mix-ins: Dos and Don’ts
When the ice cream base is ready, it’s time for mix-ins. Add fruits, nuts, candies, and more towards the end of churning, around 12-15 minutes. This way, they mix in well without changing the ice cream’s texture.
| Kitchenaid Ice Cream Maker Attachment Feature | Specification |
|---|---|
| Ice Cream Yield | Up to 2 quarts |
| Compatibility | All KitchenAid stand mixers except the 3.5 qt mini and the KPM5 bowl-lift models |
| Freeze Bowl Freezing Time | At least 15 hours |
| Churning Duration | Approximately 20-30 minutes |
| Mix-in Addition Time | 12-15 minutes into the churning process |
By following these tips, you’ll make creamy, delicious ice cream with your Kitchenaid. Enjoy making it and relish the taste of your homemade treats!
Kitchenaid Ice Cream: Perfecting the Churning Process
The churning process is key to making delicious homemade Kitchenaid ice cream. By mastering churning, you can achieve a creamy texture that’s a joy to eat. Let’s explore how to incorporate air and flavors for the best churning results.
Incorporating Air for Creamy Texture
Adding air to the ice cream mixture is vital for a creamy texture. The Kitchenaid ice cream maker does this by churning the mixture as it freezes. This creates air pockets that make the ice cream light and fluffy.
To get the best results, follow the churning time recommended for your Kitchenaid ice cream maker. Our tests showed vanilla ice cream needs about 30 minutes, while vegan ice cream takes around 40 minutes.
Mixing in Flavorings and Additions
Flavor customization is where your ice cream can really stand out. You can choose from vanilla, chocolate, or fruit-based flavors. The trick is to add your flavorings and mix-ins at the right time during churning.
Our tests found that sorbet and frozen yogurt need only 15 minutes of churning to reach their best texture. This means adding delicate flavors and mix-ins towards the end of churning helps keep them distinct.
By perfecting the churning technique, air incorporation, and flavor customization, you’ll make amazing Kitchenaid ice cream. It will impress everyone with its taste and texture.
| Test | Churning Time | Result |
|---|---|---|
| Vanilla Ice Cream | 30 minutes | Achieved desired consistency |
| Vegan Ice Cream | 40 minutes | Achieved desired consistency |
| Sorbet | 15 minutes | Achieved desired consistency |
| Frozen Yogurt | 15 minutes | Achieved desired texture |
Storage and Serving Suggestions for Homemade Ice Cream
After making your delicious Kitchenaid Ice Cream, it’s important to store and serve it right. This keeps it creamy and flavorful. Freezing it for at least 4 hours makes it scoopable. For a firmer ice cream, freeze it for up to 24 hours.
Optimal Freezing Time for Scoopability
For a soft, easy-to-scoop ice cream, freeze it for 4-6 hours. This lets it firm up without getting too hard. If you want it even firmer, freeze it for up to 24 hours.
Creative Topping and Mix-in Ideas
- Drizzle with warm chocolate sauce or caramel
- Top with a sprinkle of chopped nuts, toasted coconut, or crushed cookies
- Swirl in ribbons of fruit preserves or lemon curd
- Add a scoop of sorbet or sherbet for a refreshing contrast
- Blend in crumbled brownie bites or chunks of cookie dough
- Finish with a dollop of whipped cream and a cherry on top
There are countless ways to make your homemade Kitchenaid Ice Cream special. Try different toppings and mix-ins to create a dessert that’s all your own.
Flavor Variations and Recipe Ideas
The Kitchenaid Ice Cream Maker opens up a world of flavors! You can make classic vanilla, rich chocolate, and refreshing fruit-based ice cream at home. Whether you love vanilla ice cream or chocolate ice cream, this attachment lets your creativity shine.
Classic Vanilla Ice Cream
Begin with vanilla ice cream, a timeless favorite. Mix cream, milk, sugar, and vanilla extract for a creamy base. Enjoy it alone or add mix-ins and toppings.
Indulgent Chocolate Ice Cream
Chocolate lovers will adore the Kitchenaid Ice Cream Maker. It makes chocolate ice cream with cocoa powder, sweetened condensed milk, and vanilla. Try different cocoa blends or add chocolate chips for a special treat.
Refreshing Fruit-Based Flavors
Summer calls for fruit-based ice cream. Use fresh or frozen berries, peaches, or tropical fruits. The Kitchenaid Ice Cream Maker makes it easy to mix these flavors for a perfect balance.
Whether you’re into vanilla, chocolate, or fruit flavors, the Kitchenaid Ice Cream Maker is your key to deliciousness. Add your favorite mix-ins, swirls, and toppings to make each batch unique.
Troubleshooting Common Issues with Kitchenaid Ice Cream
Making homemade ice cream with the Kitchenaid attachment can sometimes present a few challenges. But don’t worry, we’ve got you covered! In this section, we’ll address some of the most common issues you may encounter and provide practical solutions to help you achieve the perfect Kitchenaid Ice Cream every time.
Icy Texture and Uneven Freezing
One of the most frequent complaints about Kitchenaid ice cream is an icy texture. This is caused by large ice crystals forming due to excessive water content or long freezing times. To combat this, ensure your recipe is well-balanced, with the right solid-to-liquid ratio.
Using a custard base or adding stabilizers like xanthan gum can also help create a smoother, creamier texture.
Melting and Consistency Issues
Kitchenaid ice cream may sometimes melt too quickly or have an inconsistent, rough texture. This could be due to underpowered churning or inadequate pre-cooling of the machine and ingredients. Make sure to fully freeze the bowl and pre-chill the mixture before churning.
Additionally, consider increasing the fat content in your recipe for a richer, more scoopable consistency.
Troubleshooting Freezing Failures
If your Kitchenaid ice cream refuses to freeze at all, there could be a few culprits. Ensure your freezer is set to the optimal temperature (0°F/-18°C) and that the bowl is properly pre-frozen for at least 12-18 hours. Additionally, check that your ingredients are properly chilled before churning, and consider reducing the liquid content in your recipe.
By addressing these common issues and following best practices for Kitchenaid ice cream making, you’ll be well on your way to creating consistently delicious, creamy, and scoopable homemade treats.
“The Kitchenaid ice cream maker has an online rating of 3.5/5, considered an internet F rating. Users have reported issues such as cracking, leaking of freezer gel, and durability problems with the Kitchenaid ice cream maker. Several users expressed disappointment with the performance of the Kitchenaid ice cream maker compared to other models.”
| Issue | Cause | Solution |
|---|---|---|
| Icy Texture | Unbalanced recipe, excessive water content, long freezing times | Use a custard base, add stabilizers like xanthan gum, ensure proper solid-to-liquid ratio |
| Melting and Consistency | Underpowered churning, inadequate pre-cooling | Fully freeze the bowl, pre-chill the mixture, increase fat content in recipe |
| Freezing Failures | Improper freezer temperature, insufficient pre-freezing of bowl | Set freezer to 0°F/-18°C, pre-freeze bowl for 12-18 hours, reduce liquid content in recipe |
Kitchenaid Ice Cream: A Versatile Delight
Homemade Kitchenaid Ice Cream is a treat that can be enjoyed alone or with desserts and toppings. The KitchenAid Ice Cream Maker Attachment makes 2 quarts of ice cream, gelato, or sorbet quickly. It’s known for its great texture and taste, working with many KitchenAid mixers.
The attachment is easy to use and has a compact size. It fits well in kitchen cabinets or on shelves. This makes it easy to store and use in your kitchen.
Serving Ideas and Dessert Pairings
Kitchenaid Ice Cream is versatile, offering many serving ideas and dessert pairings. You can enjoy it in sundaes with whipped cream, nuts, and caramel or chocolate sauce. Or try ice cream sandwiches, floats, and milkshakes for something new.
- Top scoops of Kitchenaid Ice Cream with fresh fruit, crushed cookies, or toasted coconut for a twist.
- Pair Kitchenaid Ice Cream with warm fruit pies, cobblers, or crumbles for a hot and cold mix.
- Scoop Kitchenaid Ice Cream onto a warm brownie or cake for a rich dessert.
Kitchenaid Ice Cream is perfect for summer gatherings or a sweet treat. It can be the main attraction or a great addition to a dessert spread.
| Product | Price | Quantity | Bulk Savings |
|---|---|---|---|
| KitchenAid Ice Cream Maker Attachment | $99.60 | 4 units | $93.62 per unit |
Unlock your Kitchenaid Stand Mixer’s full potential with homemade ice cream, gelato, and sorbet. The KitchenAid Ice Cream Maker Attachment lets you make a variety of frozen treats. They will amaze your taste buds and impress your guests.
Conclusion: Embracing the Joys of Homemade Kitchenaid Ice Cream
Creating homemade ice cream with your Kitchenaid stand mixer is incredibly rewarding. It opens up a world of flavors, from classic vanilla to rich chocolate and fruity options. This guide has shown you how to make the most of your Kitchenaid Ice Cream Maker attachment.
The Kitchenaid Ice Cream Maker is amazing. It can make up to 1.9 liters of ice cream at once. Its fast freezing technology makes making ice cream easy and quick. The result is ice cream that’s smooth and creamy, thanks to the Kitchenaid’s design and churning process.
By making your own Kitchenaid Ice Cream, you can impress everyone with your skills. You’ll enjoy making and sharing these treats with your loved ones. Get creative with flavors and enjoy the fun of making Kitchenaid Ice Cream a favorite in your kitchen.
Kitchenaid Ice Cream Recipe
Whip up decadent Kitchenaid ice cream at home with your stand mixer. Try quick recipes and pro tips for rich, creamy frozen treats.
Ingredients
- 3 cups heavy cream
- 1 cup milk
- 1 cup sugar
- 1/2 cup corn syrup
- 1 teaspoon vanilla extract
- 1/4 teaspoon salt
Instructions
- Chill the BowlFreeze a metal bowl for at least 15 minutes.
- Combine IngredientsIn a medium bowl, whisk together 1 cup cold milk, 1 cup heavy cream, 1/2 cup sugar, and 1 teaspoon vanilla extract.
- Pour into BowlRemove the chilled bowl from the freezer and pour the mixture into it.
- Freeze and StirFreeze the mixture for 20 minutes, then remove and stir with a fork.
- Repeat FreezingFreeze for another 20 minutes and stir again.
- Freeze CompletelyContinue freezing and stirring every 20 minutes until the ice cream reaches a soft-serve consistency.
- EnjoyServe immediately or freeze for later.
Nutrition Information:
Yield: 6 Serving Size: 1Amount Per Serving: Calories: 636Total Fat: 44gSaturated Fat: 28gTrans Fat: 2gUnsaturated Fat: 13gCholesterol: 138mgSodium: 157mgCarbohydrates: 60gFiber: 0gSugar: 61gProtein: 5g
FAQ
What are the essential ingredients for making creamy Kitchenaid Ice Cream?
To make creamy Kitchenaid Ice Cream, you need cream, milk, and eggs. These ingredients form the base. You can add sweeteners like sugar or syrups to change the flavor.
How do eggs contribute to the texture of homemade ice cream?
Eggs are key for a smooth texture in homemade ice cream. They make a custard that thickens the mix. This gives the ice cream a rich, fluffy feel.
What is the connection between crème anglaise and the classic vanilla ice cream base?
Crème anglaise is a French custard sauce that’s the base for many ice creams. It’s similar to the vanilla ice cream base used in Kitchenaid recipes.
What are some key tips for using the Kitchenaid Ice Cream Maker attachment?
Important tips for the Kitchenaid Ice Cream Maker include knowing the freezing time and churning duration. Also, learn how to add mix-ins correctly.
How does the churning process affect the texture of Kitchenaid Ice Cream?
Churning adds air to the mix, making it creamy and smooth. Using the right churning techniques and adding flavors are key for the perfect texture.
How should homemade Kitchenaid Ice Cream be stored and served?
Store your ice cream right to keep it scoopable. Use creative toppings and mix-ins to make it even better.
What are some common issues that may arise when making Kitchenaid Ice Cream, and how can they be addressed?
Issues like overchurning or icy texture can happen. This section offers solutions to help you make perfect ice cream every time.


